
你曾想尝试在服务器端或电脑上向手机发送通知吗?
你曾烦恼过企业邮箱的防骚扰机制吗?
现在,我们可以用一种简单轻松的方法来代替企业邮箱了!
进行以下的实验,你需要做好以下准备
- 1)注册并在手机上下载IFTTT
- 2)Python3
1. 注册配置 IFTTT
首先注册一个IFTTT账号 (https://ifttt.com).
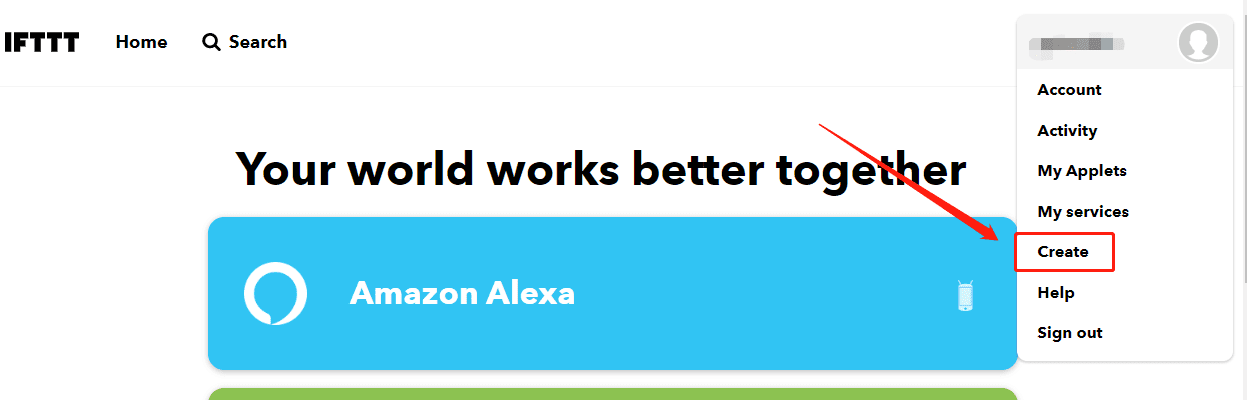
登录进入页面后点击右上角create,准备新建一个applet.
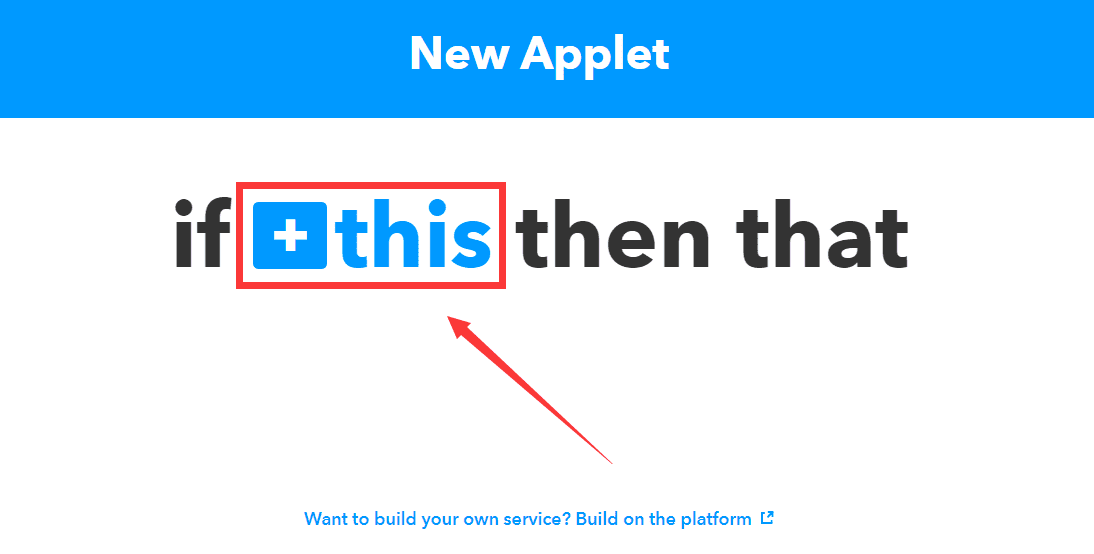
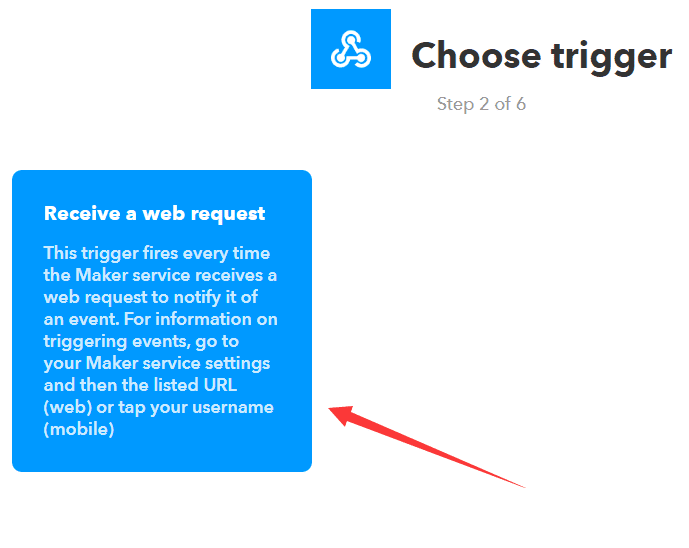
进去后点击 + this, 如图。
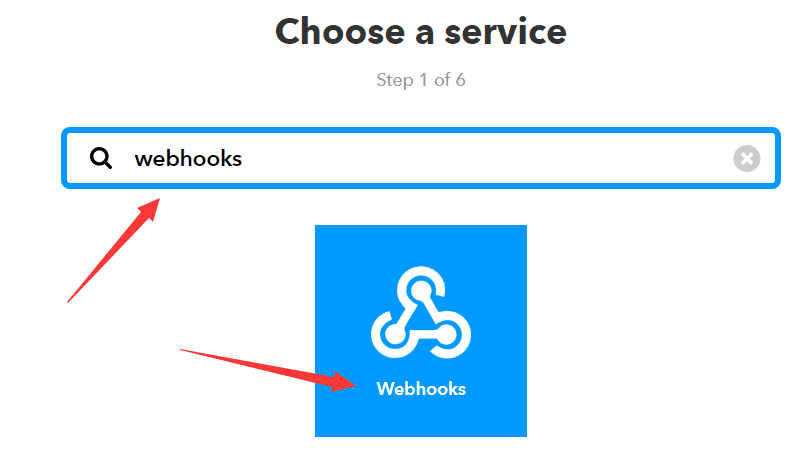
搜索 webhooks.
进去后选择Receive a web request, 这个trigger能够使得这个webhooks收到一个http请求后触发一个事件。
编写该trigger的名称
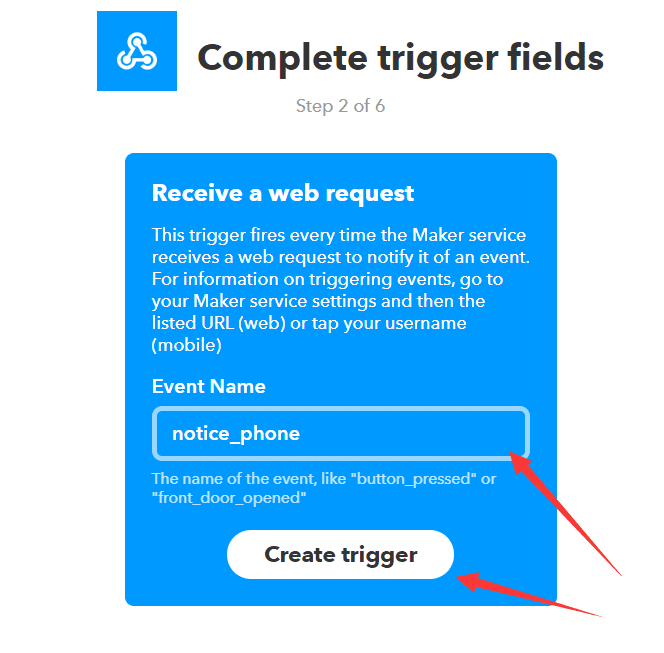
然后点击 that.

搜索notification.
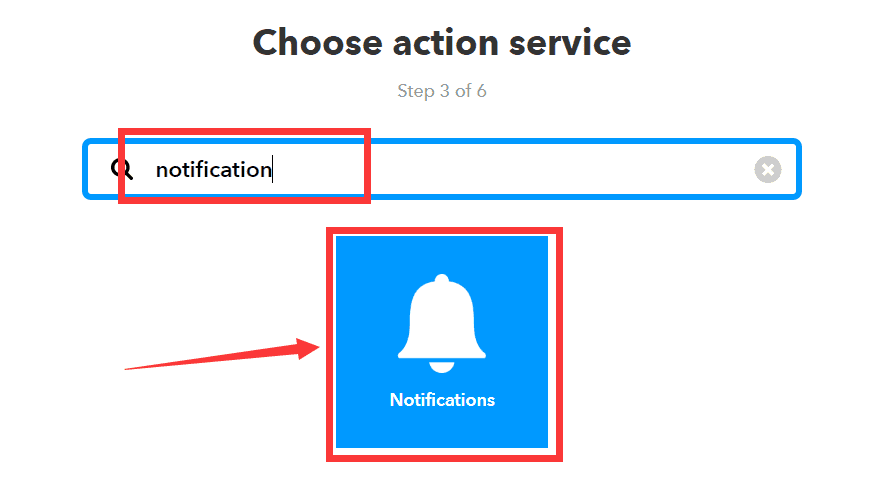
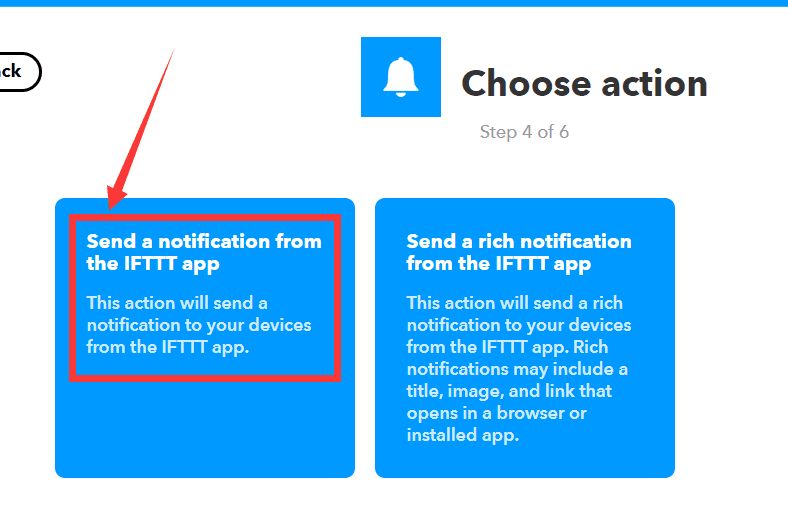
选择send a notification from the IFTTT app. 这个action能够使得IFTTT发出一个通知。
里面可以设置消息的格式,其中:{{EventName}}是我们前面设定的事件名称,而Add ingredient里面的value1、value2、value3则是服务器端发送http请求时带的参数。
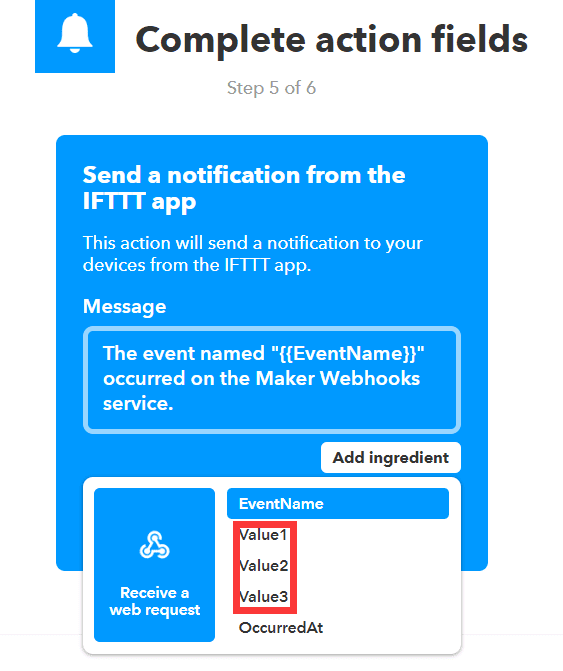
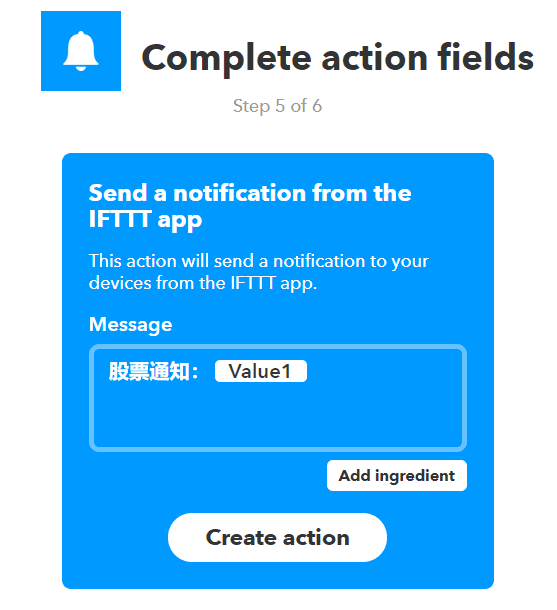
可以设置成如下的格式:
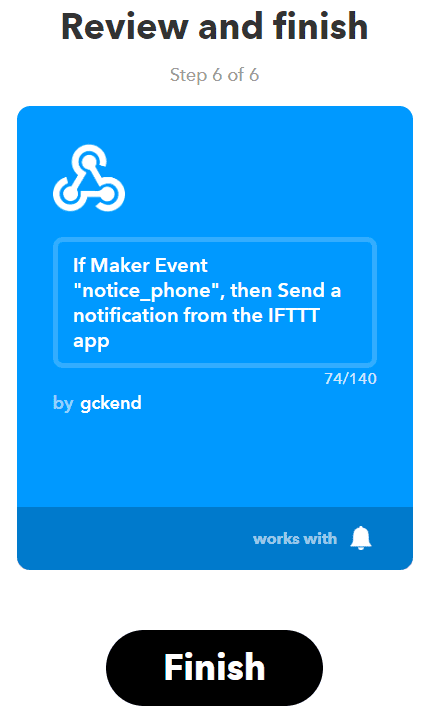
Finish!
好了,准备完毕,我们开始编写Python脚本了!
2.Python 通知脚本编写
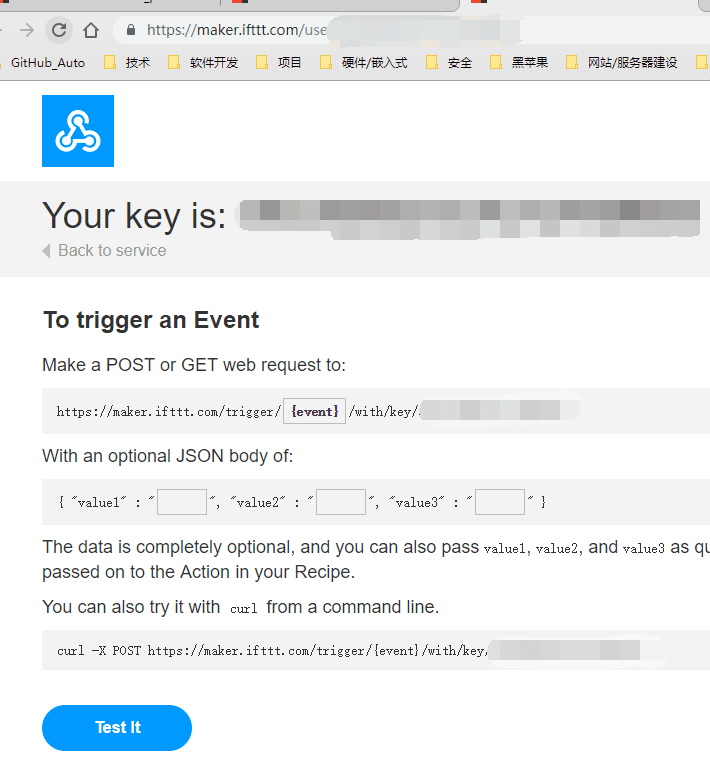
进入 https://ifttt.com/maker_webhooks 页面,你可以看见你刚新建的webhooks.
点击右上角的Documentation.
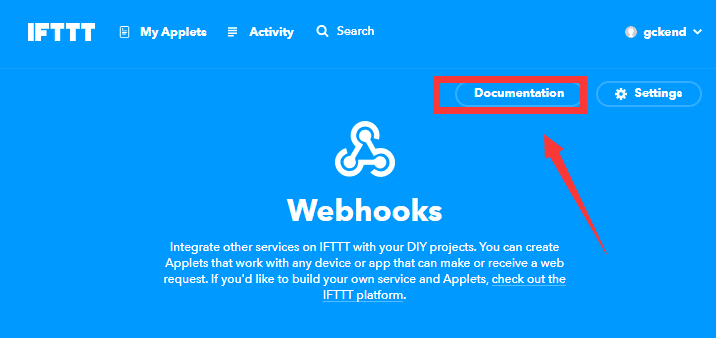
进去之后你就可以看见你关于这个应用的Key. 可以看见其调用方式就是通过发送POST或GET请求到下面这个网址:
https://maker.IFTTT.com/trigger/你的event_name/with/key/你的Key
其中,你还可以带三个参数,以json格式放在body中,如 {“value1”: “这是一个测试”},最终通知里的Value1会被这个value1替代。
制作通知脚本,例如新建一个文件叫 notice.py如下,text放你想发送的文本,可以把notice.py放在你本机上,也可以放在服务器上结合某种功能。记得先在手机上先下载好IFTTT并登陆。
打开CMD(Windows)/Terminal(macos)进入该文件目录,运行:
python notice.py
运行完毕后,手机应当就会收到通知了,如果没有收到通知,请检查你的系统设置有没有给IFTTT通知的权限。
import requests
import json
def send_notice(event_name, key, text):
"""
通过IFTTT发送手机通知
Args:
event_name (str): 事件名称
key (str): IFTTT上的Key
text (str): 通知文本信息
"""
url = f"https://maker.ifttt.com/trigger/{event_name}/with/key/{key}"
payload = {"value1": text}
headers = {"Content-Type": "application/json"}
response = requests.request("POST", url, data=json.dumps(payload), headers=headers)
print(response.text)
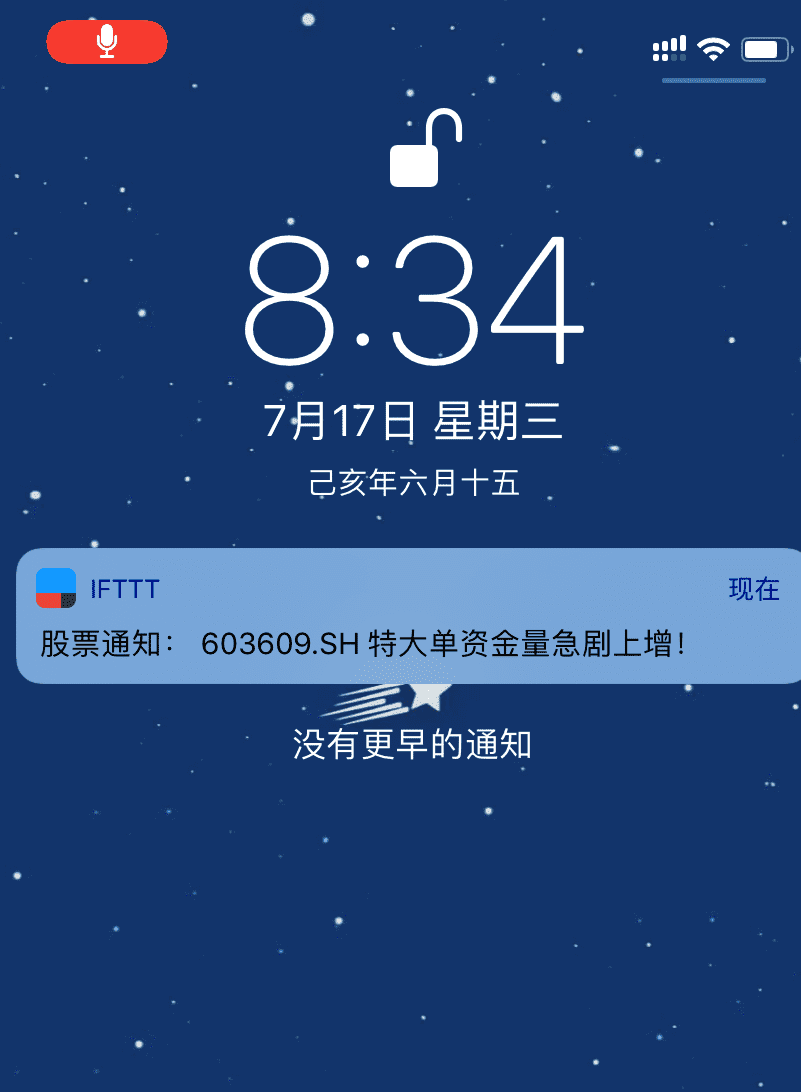
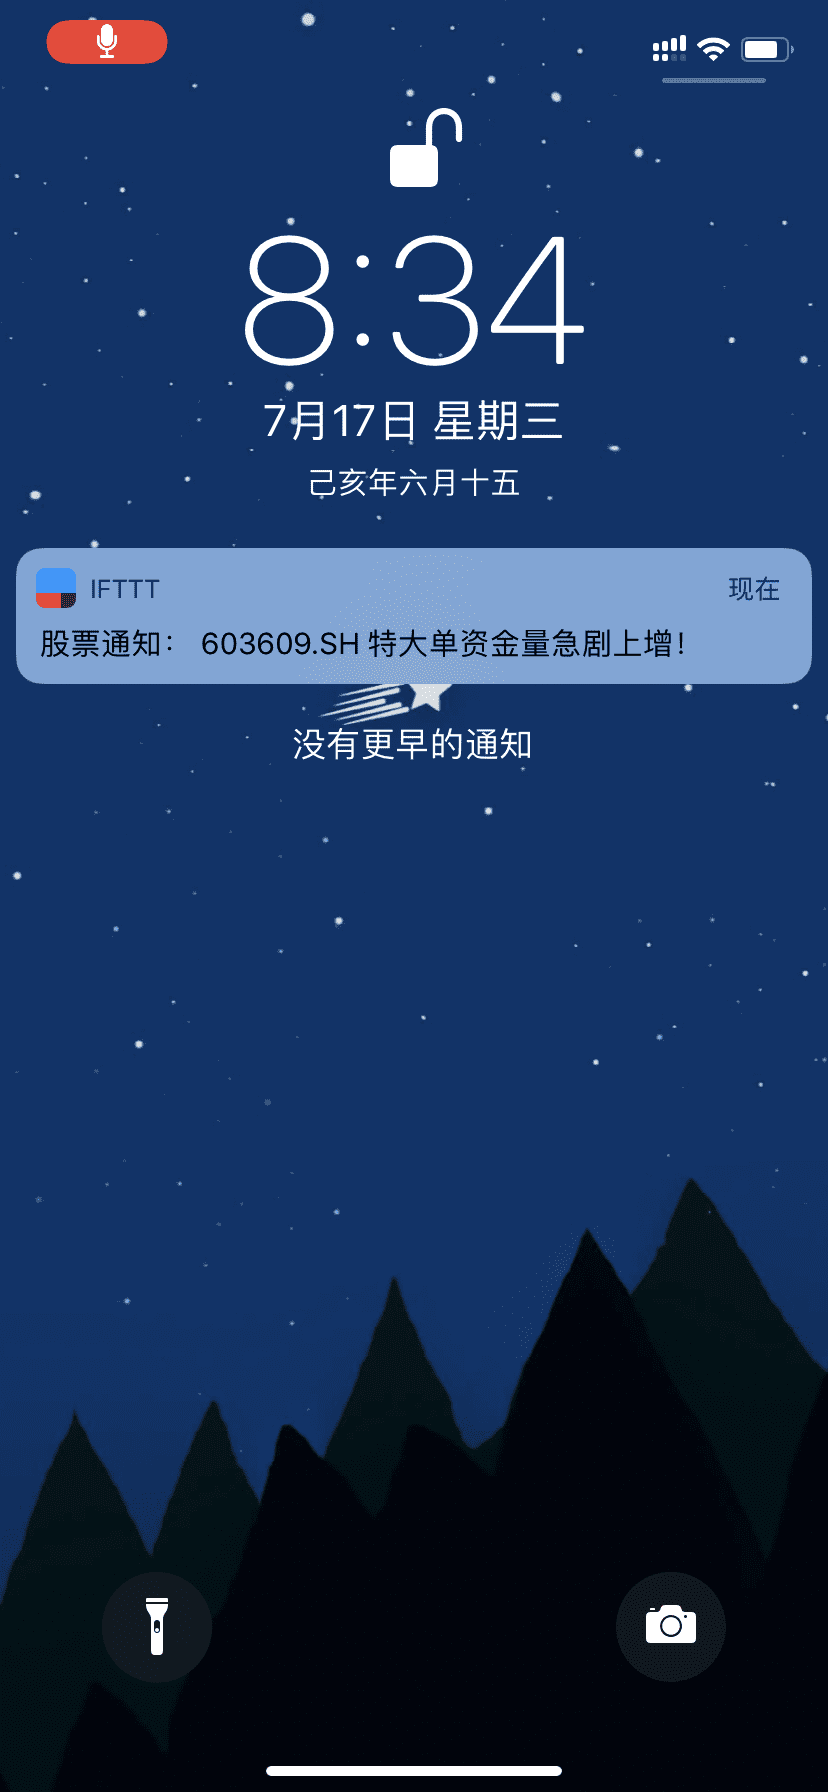
text = "603609.SH 特大单资金量急剧上增!"
send_notice('事件名称', 'Key', text)效果如图:
喜欢的话,欢迎关注微信公众号:Python实用宝典
自动通知系列文章:
未来会有更多的有用的Python教程继续放出哦,请持续关注我们的网站和公众号!

评论(0)