标签归档:cli

Beets-音乐库管理器和MusicBrainz标记器

Beets 是为痴迷的音乐极客准备的媒体图书馆管理系统。

甜菜的目的是让你的音乐收藏一劳永逸。它会对您的收藏进行编目,并在运行过程中自动改进其元数据。然后,它提供一系列工具来操作和访问您的音乐

这里有一个甜菜聪明的标签校正器的例子:

$ beet import ~/music/ladytron
Tagging:
    Ladytron - Witching Hour
(Similarity: 98.4%)
 * Last One Standing      -> The Last One Standing
 * Beauty                 -> Beauty*2
 * White Light Generation -> Whitelightgenerator
 * All the Way            -> All the Way...

因为甜菜被设计成一个图书馆,它几乎可以为你的音乐收藏做任何你能想象到的事情。通过plugins,甜菜成了灵丹妙药:

如果甜菜还没有达到你的要求,writing your own plugin如果你懂一点Python就会觉得非常简单

安装

您可以通过键入以下命令来安装甜菜pip install beets甜菜也已经包装在software repositories有几个发行版本。请查看Getting Started有关详细信息,请参阅指南

贡献力量

感谢您考虑为beets好了!无论您是不是程序员,您都应该能够在以下位置找到所需的所有信息CONTRIBUTING.rst

阅读更多内容

有关甜菜的更多信息,请访问its Web site关注@b33ts在Twitter上获取新闻和最新消息

联系方式

  • 遇到了您要报告的错误吗?请查看我们的issue tracker好了!
    • 如果您的问题尚未报告,请open a new ticket我们将很快与您联系
    • 如果您想对某个功能/错误进行投票,只需给出一个👍在你希望看到优先于其他问题的问题上
  • 需要帮助/支持,想要开始讨论,对新功能有想法,还是只是想向团队介绍自己?检查GitHub DiscussionsDiscourse好了!

作者

甜菜来了Adrian Sampson有上千人的配角

Http-prompt 构建在HTTPie之上的交互式命令行HTTP和API测试客户端,具有自动完成、语法突出显示等功能

Gitsome-增强型Git/GitHub命令行界面(CLI)。GitHub和GitHub企业的官方集成:https://github.com/works-with/category/desktop-tools

一个Official Integration对于GitHub和GitHub Enterprise

为什么gitsome

Git命令行

虽然标准的Git命令行是管理基于Git的repo的一个很好的工具,但是它可以很难记住这个用法地址为:

  • 150多个瓷器和管道命令
  • 无数特定于命令的选项
  • 标签和分支等资源

Git命令行不与GitHub集成,强制您在命令行和浏览器之间切换

gitsome-具有自动完成功能的增压Git/GitHub CLI

gitsome旨在通过专注于以下方面来增强您的标准git/shell界面:

  • 提高易用性
  • 提高工作效率

深度GitHub集成

并不是所有的GitHub工作流都能在终端中很好地工作;gitsome试图将目标对准那些这样做的人

gitsome包括29个与一起使用的GitHub集成命令ALL外壳:

$ gh <command> [param] [options]

gh命令以及Git-Extrashub解锁更多GitHub集成的命令!

带有交互式帮助的Git和GitHub自动完成程序

您可以运行可选壳牌:

 $ gitsome

要启用自动完成交互式帮助对于以下内容:

通用自动补全程序

gitsome自动完成以下内容:

  • Shell命令
  • 文件和目录
  • 环境变量
  • 手册页
  • python

要启用其他自动完成,请查看Enabling Bash Completions部分

鱼式自动建议

gitsome支持鱼式自动建议。使用right arrow完成建议的关键

Python REPL

gitsome由以下人员提供动力xonsh,它支持Python REPL

在shell命令旁边运行Python命令:

附加内容xonsh功能可在xonsh tutorial

命令历史记录

gitsome跟踪您输入的命令并将其存储在~/.xonsh_history.json使用向上和向下箭头键循环查看命令历史记录

可自定义的突出显示

可以控制用于突出显示的ansi颜色,方法是更新~/.gitsomeconfig文件

颜色选项包括:

'black', 'red', 'green', 'yellow',
'blue', 'magenta', 'cyan', 'white'

对于无颜色,请将值设置为Nonewhite在某些终端上可能显示为浅灰色

可用的平台

gitsome适用于Mac、Linux、Unix、Windows,以及Docker

待办事项

并不是所有的GitHub工作流都能在终端中很好地工作;gitsome试图将目标对准那些这样做的人

  • 添加其他GitHub API集成

gitsome才刚刚开始。请随意……contribute!

索引

GitHub集成命令

安装和测试

杂项

GitHub集成命令语法

用法:

$ gh <command> [param] [options]

GitHub集成命令列表

  configure            Configure gitsome.
  create-comment       Create a comment on the given issue.
  create-issue         Create an issue.
  create-repo          Create a repo.
  emails               List all the user's registered emails.
  emojis               List all GitHub supported emojis.
  feed                 List all activity for the given user or repo.
  followers            List all followers and the total follower count.
  following            List all followed users and the total followed count.
  gitignore-template   Output the gitignore template for the given language.
  gitignore-templates  Output all supported gitignore templates.
  issue                Output detailed information about the given issue.
  issues               List all issues matching the filter.
  license              Output the license template for the given license.
  licenses             Output all supported license templates.
  me                   List information about the logged in user.
  notifications        List all notifications.
  octo                 Output an Easter egg or the given message from Octocat.
  pull-request         Output detailed information about the given pull request.
  pull-requests        List all pull requests.
  rate-limit           Output the rate limit.  Not available for Enterprise.
  repo                 Output detailed information about the given filter.
  repos                List all repos matching the given filter.
  search-issues        Search for all issues matching the given query.
  search-repos         Search for all repos matching the given query.
  starred              Output starred repos.
  trending             List trending repos for the given language.
  user                 List information about the given user.
  view                 View the given index in the terminal or a browser.

GitHub集成命令参考:COMMANDS.md

请参阅GitHub Integration Commands Reference in COMMANDS.md对于详细讨论所有GitHub集成命令、参数、选项和示例

请查看下一节,了解快速参考

GitHub集成命令快速参考

配置gitsome

要与GitHub正确集成,您必须首先配置gitsome

$ gh configure

对于GitHub Enterprise用户,使用-e/--enterprise标志:

$ gh configure -e

列表源

列出您的新闻源

$ gh feed

列出用户的活动摘要

查看您的活动订阅源或其他用户的活动订阅源,也可以选择使用寻呼机-p/--pager这个pager option可用于许多命令

$ gh feed donnemartin -p

列出回购的活动提要

$ gh feed donnemartin/gitsome -p

列出通知

$ gh notifications

列出拉式请求

查看您的回购的所有拉式请求:

$ gh pull-requests

过滤问题

查看您提到的所有未决问题:

$ gh issues --issue_state open --issue_filter mentioned

查看所有问题,只筛选分配给您的问题,而不考虑状态(打开、关闭):

$ gh issues --issue_state all --issue_filter assigned

有关过滤和州限定词的更多信息,请访问gh issues参考位置COMMANDS.md

过滤星级报告

$ gh starred "repo filter"

搜索问题和报告

搜索问题

+1最多的搜索问题:

$ gh search-issues "is:open is:issue sort:reactions-+1-desc" -p

评论最多的搜索问题:

$ gh search-issues "is:open is:issue sort:comments-desc" -p

使用“需要帮助”标签搜索问题:

$ gh search-issues "is:open is:issue label:\"help wanted\"" -p

已标记您的用户名的搜索问题@donnemartin

$ gh search-issues "is:issue donnemartin is:open" -p

搜索您所有未解决的私人问题:

$ gh search-issues "is:open is:issue is:private" -p

有关查询限定符的更多信息,请访问searching issues reference

搜索报告

搜索2015年或之后创建的所有Python repos,>=1000星:

$ gh search-repos "created:>=2015-01-01 stars:>=1000 language:python" --sort stars -p

有关查询限定符的更多信息,请访问searching repos reference

列出趋势报告和开发人员

查看趋势回购:

$ gh trending [language] [-w/--weekly] [-m/--monthly] [-d/--devs] [-b/--browser]

查看趋势DEV(目前仅浏览器支持DEV):

$ gh trending [language] --devs --browser

查看内容

这个view命令

查看前面列出的通知、拉取请求、问题、回复、用户等,HTML格式适合您的终端,也可以选择在您的浏览器中查看:

$ gh view [#] [-b/--browser]

这个issue命令

查看问题:

$ gh issue donnemartin/saws/1

这个pull-request命令

查看拉取请求:

$ gh pull-request donnemartin/awesome-aws/2

设置.gitignore

列出所有可用的.gitignore模板:

$ gh gitignore-templates

设置您的.gitignore

$ gh gitignore-template Python > .gitignore

设置LICENSE

列出所有可用的LICENSE模板:

$ gh licenses

设置您的或LICENSE

$ gh license MIT > LICENSE

召唤十月猫

在十月猫那天打电话说出给定的信息或复活节彩蛋:

$ gh octo [say]

查看配置文件

查看用户的配置文件

$ gh user octocat

查看您的个人资料

使用查看您的个人资料gh user [YOUR_USER_ID]命令或使用以下快捷方式:

$ gh me

创建评论、问题和报告

创建评论:

$ gh create-comment donnemartin/gitsome/1 -t "hello world"

创建问题:

$ gh create-issue donnemartin/gitsome -t "title" -b "body"

创建回购:

$ gh create-repo gitsome

选项:在寻呼机中查看

许多gh命令支持-p/--pager在寻呼机中显示结果的选项(如果可用)

用法:

$ gh <command> [param] [options] -p
$ gh <command> [param] [options] --pager

选项:在浏览器中查看

许多gh命令支持-b/--browser在默认浏览器(而不是终端)中显示结果的选项

用法:

$ gh <command> [param] [options] -b
$ gh <command> [param] [options] --browser

请参阅COMMANDS.md有关所有GitHub集成命令、参数、选项和示例的详细列表

记住这些命令有困难吗?看看手边的autocompleter with interactive help来指导您完成每个命令

注意,您可以将gitsome与其他实用程序(如Git-Extras

安装

PIP安装

gitsome托管在PyPI将安装以下命令gitsome

$ pip3 install gitsome

您还可以安装最新的gitsome来自GitHub源,可能包含尚未推送到PyPI的更改:

$ pip3 install git+https://github.com/donnemartin/gitsome.git

如果您没有安装在virtualenv,您可能需要运行sudo

$ sudo pip3 install gitsome

pip3

根据您的设置,您可能还希望运行pip3使用-H flag

$ sudo -H pip3 install gitsome

对于大多数Linux用户来说,pip3可以使用python3-pip套餐

例如,Ubuntu用户可以运行:

$ sudo apt-get install python3-pip

看这个ticket有关更多详细信息,请参阅

虚拟环境安装

您可以将Python包安装在virtualenv要避免依赖项或权限的潜在问题,请执行以下操作

如果您是Windows用户,或者如果您想了解更多有关virtualenv,看看这个guide

安装virtualenvvirtualenvwrapper

$ pip3 install virtualenv
$ pip3 install virtualenvwrapper
$ export WORKON_HOME=~/.virtualenvs
$ source /usr/local/bin/virtualenvwrapper.sh

创建gitsomevirtualenv并安装gitsome

$ mkvirtualenv gitsome
$ pip3 install gitsome

如果pip安装不起作用,您可能默认运行的是Python2。检查您正在运行的Python版本:

$ python --version

如果上面的调用结果是Python 2,请找到Python 3的路径:

$ which python3  # Python 3 path for mkvirtualenv's --python option

如果需要,安装Python 3。调用时设置Python版本mkvirtualenv

$ mkvirtualenv --python [Python 3 path from above] gitsome
$ pip3 install gitsome

如果要激活gitsomevirtualenv稍后再次运行:

$ workon gitsome

要停用gitsomevirtualenv,运行:

$ deactivate

作为Docker容器运行

您可以在Docker容器中运行gitome,以避免安装Python和pip3当地的。要安装Docker,请查看official Docker documentation

一旦安装了docker,您就可以运行gitome:

$ docker run -ti --rm mariolet/gitsome

您可以使用Docker卷让gitome访问您的工作目录、本地的.gitSomeconfig和.gitconfig:

$ docker run -ti --rm -v $(pwd):/src/              \
   -v ${HOME}/.gitsomeconfig:/root/.gitsomeconfig  \
   -v ${HOME}/.gitconfig:/root/.gitconfig          \
   mariolet/gitsome

如果您经常运行此命令,则可能需要定义别名:

$ alias gitsome="docker run -ti --rm -v $(pwd):/src/              \
                  -v ${HOME}/.gitsomeconfig:/root/.gitsomeconfig  \
                  -v ${HOME}/.gitconfig:/root/.gitconfig          \
                  mariolet/gitsome"

要从源构建Docker映像,请执行以下操作:

$ git clone https://github.com/donnemartin/gitsome.git
$ cd gitsome
$ docker build -t gitsome .

启动gitsome

安装后,运行可选的gitsome带有交互式帮助的自动完成程序:

$ gitsome

运行可选的gitsomeShell将为您提供自动完成、交互式帮助、鱼式建议、Python REPL等

正在运行gh命令

运行GitHub集成命令:

$ gh <command> [param] [options]

注意:运行gitsome不需要执行外壳程序gh命令。之后installinggitsome你可以跑gh来自任何shell的命令

运行gh configure命令

要与GitHub正确集成,gitsome必须正确配置:

$ gh configure

针对GitHub企业用户

使用-e/--enterprise标志:

$ gh configure -e

要查看更多详细信息,请访问gh configure部分

启用Bash完成

默认情况下,gitsome查看以下内容locations to enable bash completions

要添加其他bash完成,请更新~/.xonshrc包含bash完成位置的文件

如果~/.xonshrc不存在,请创建它:

$ touch ~/.xonshrc

例如,如果在/usr/local/etc/my_bash_completion.d/completion.bash,将以下行添加到~/.xonshrc

$BASH_COMPLETIONS.append('/usr/local/etc/my_bash_completion.d/completion.bash')

您将需要重新启动gitsome要使更改生效,请执行以下操作

正在启用gh在外部完成制表符gitsome

你可以跑gh外部的命令gitsome外壳完成器。要启用gh此工作流的制表符完成,请将gh_complete.sh本地文件

让bash知道可以完成gh当前会话中的命令:

$ source /path/to/gh_complete.sh

要为所有终端会话启用制表符完成,请将以下内容添加到您的bashrc文件:

source /path/to/gh_complete.sh

重新加载您的bashrc

$ source ~/.bashrc

提示:.是的缩写source,因此您可以改为运行以下命令:

$ . ~/.bashrc

对于Zsh用户

zsh包括与bash完成兼容的模块

下载gh_complete.sh文件,并将以下内容附加到您的.zshrc

autoload bashcompinit
bashcompinit
source /path/to/gh_complete.sh

重新加载您的zshrc

 $ source ~/.zshrc

可选:安装PILPillow

将化身显示为gh megh user命令需要安装可选的PILPillow依赖性

Windows*和Mac:

$ pip3 install Pillow

*请参阅Windows Support有关化身限制的部分

Ubuntu用户,看看这些instructions on askubuntu

支持的Python版本

  • Python 3.4
  • Python 3.5
  • Python 3.6
  • Python 3.7

gitsome由以下人员提供动力xonsh,它当前不支持Python2.x,如本文中所讨论的ticket

支持的平台

  • Mac OS X
    • 在OS X 10.10上测试
  • Linux、Unix
    • 在Ubuntu 14.04 LTS上测试
  • 窗口
    • 在Windows 10上测试

Windows支持

gitsome已在Windows 10上进行了测试,cmdcmder

虽然您可以使用标准的Windows命令提示符,但使用这两种命令提示符都可能会有更好的体验cmderconemu

纯文本化身

命令gh usergh me将永远拥有-t/--text_avatar标志已启用,因为img2txt不支持Windows上的ANSI头像

配置文件

在Windows上,.gitsomeconfig 文件可在以下位置找到%userprofile%例如:

C:\Users\dmartin\.gitsomeconfig

开发人员安装

如果您有兴趣为gitsome,请运行以下命令:

$ git clone https://github.com/donnemartin/gitsome.git
$ cd gitsome
$ pip3 install -e .
$ pip3 install -r requirements-dev.txt
$ gitsome
$ gh <command> [param] [options]

pip3

如果您在安装时收到一个错误,提示您需要Python 3.4+,这可能是因为您的pip命令是为旧版本的Python配置的。要解决此问题,建议安装pip3

$ sudo apt-get install python3-pip

看这个ticket有关更多详细信息,请参阅

持续集成

有关持续集成的详细信息,请访问Travis CI

单元测试和代码覆盖率

在活动的Python环境中运行单元测试:

$ python tests/run_tests.py

使用运行单元测试tox在多个Python环境中:

$ tox

文档

源代码文档将很快在Readthedocs.org请查看source docstrings

运行以下命令构建文档:

$ scripts/update_docs.sh

贡献

欢迎投稿!

回顾Contributing Guidelines有关如何执行以下操作的详细信息,请执行以下操作:

  • 提交问题
  • 提交拉式请求

学分

联系信息

请随时与我联系,讨论任何问题、问题或评论

我的联系信息可以在我的GitHub page

许可证

我在开放源码许可下向您提供此存储库中的代码和资源。因为这是我的个人存储库,您获得的我的代码和资源的许可证来自我,而不是我的雇主(Facebook)

Copyright 2016 Donne Martin

Licensed under the Apache License, Version 2.0 (the "License");
you may not use this file except in compliance with the License.
You may obtain a copy of the License at

   http://www.apache.org/licenses/LICENSE-2.0

Unless required by applicable law or agreed to in writing, software
distributed under the License is distributed on an "AS IS" BASIS,
WITHOUT WARRANTIES OR CONDITIONS OF ANY KIND, either express or implied.
See the License for the specific language governing permissions and
limitations under the License.

Social-analyzer-API、CLI和Web应用程序,用于分析和查找跨社交媒体/网站的个人资料

Social Analyzer-API、CLI和Web应用程序,用于分析和查找一个人在+800个社交媒体/网站上的个人资料。它包括不同的字符串分析和检测模块,您可以选择在调查过程中使用哪种模块组合

检测模块利用基于不同检测技术的评级机制,该机制产生从0到100(否-可能-是)的率值。本模块旨在减少误报,并在下面的文档中进行了说明Wiki链接

从该OSINT工具分析和公开提取的信息可以帮助调查与可疑或恶意活动相关的配置文件,例如cyberbullyingcybergroomingcyberstalking,以及spreading misinformation

这个项目是“目前一些执法机构在资源有限的国家使用”

Social Analyzer is in a league of its own and is a very impressive tool that I thoroughly recommend for Digital Investigators and OSINT practitioners-由Joseph Jones, Founder of Strategy Nord, Unita Insight and OS2INT

更新

  • GUI版本的新更新-您可以生成类别统计信息。此外,您还可以在设置窗口中根据网站的全球排名选择网站🔥
  • CLI的新更新-您可以根据网站的全球排名选择网站,如-网站TOP10,-网站TOP123等。🔥
  • 新的Social-Analyzer版本使用它自己的名为Ixora的自动图形可视化
  • 我已经收到了很多公共和私人的请求,要求将静电网站的信息添加到检测数据库中,这一点正在实施中,+400%的检测应该有这样的要求。如果您有任何非私人模块,并且您无法查看静电网站的信息,请下载最新版本或发送电子邮件给我以了解详细信息

所以·社会我·迪·a

使用户能够创建和共享内容或参与社交网络的网站和应用程序-牛津词典

安全测试

-------------------------------------              ---------------------------------
|        Security Testing           |              |        Social-Analyzer        |
-------------------------------------              ---------------------------------
|   Passive Information Gathering   |     <-->     |   Find Social Media Profiles  |
|                                   |              |                               |
|    Active Information Gathering   |     <-->     |    Post Analysis Activities   |
-------------------------------------              ---------------------------------

应用程序

标准本地主机Web应用URL:http://0.0.0.0:9005/app.html

CLI

功能

  • 字符串和名称分析(排列和组合)
  • 使用多种技术(HTTPS库和WebDriver)查找配置文件
  • 多层检测(OCR、普通、高级和特殊)
  • 使用Ixora(元数据和模式)可视化配置文件信息
  • 元数据和模式提取(从Qeeqbox OSINT项目添加)
  • 元数据的强制有向图(需要ExtractPatterns)
  • 自动调情到不必要的输出
  • 搜索引擎查找(Google API-可选)
  • 自定义搜索查询(Google API和DuckDuckGo API-可选)
  • 个人资料屏幕截图、标题、信息和网站描述
  • 按语言查找姓名来源、姓名相似度和常用词
  • 自定义用户-代理、代理、超时和隐式等待
  • Python CLI&NodeJS CLI(仅限于FindUserProfilesFast选项)
  • 用于更快检查的网格选项(仅限于对接合成)
  • 将日志转储到文件夹或终端(美化)
  • 调整查找\获取配置文件工作进程(默认值为15)
  • 失败配置文件的重新检查选项
  • 按好的、可能的和坏的过滤配置文件
  • 将分析另存为JSON文件
  • 简化的Web界面和客户端

特殊探测

安装和运行

Linux(作为节点WebApp)

sudo apt-get update
#Depedning on your Linux distro, you may or may not need these 2 lines
sudo DEBIAN_FRONTEND=noninteractive apt-get install -y software-properties-common
sudo add-apt-repository ppa:mozillateam/ppa -y
sudo apt-get install -y firefox-esr tesseract-ocr git nodejs npm
git clone https://github.com/qeeqbox/social-analyzer.git
cd social-analyzer
npm install
npm start

Linux(作为python包)

sudo apt-get update
sudo apt-get install python3 python3-pip
pip3 install social-analyzer
social-analyzer --username "johndoe" --metadata
#or
python3 -m social-analyzer --username "johndoe" --metadata

Linux(作为python脚本)

sudo apt-get update
sudo apt-get install git python3 python3-pip
git clone https://github.com/qeeqbox/social-analyzer
cd social-analyzer
pip3 install –r requirements.txt
python3 app.py social-analyzer --username "johndoe" --metadata

作为对象导入(Python)

from importlib import import_module
SocialAnalyzer = import_module("social-analyzer").SocialAnalyzer(silent=True)
results = SocialAnalyzer.run_as_object(username="johndoe",silent=True)
print(results)

Linux、Windows、MacOS、Raspberry pi

  • 检查一下这个wiki适用于所有可能的安装方法
  • 检查一下这个wiki用于将社交分析器与您的OSINT工具、提要等集成

社交分析器–h

Required Arguments:
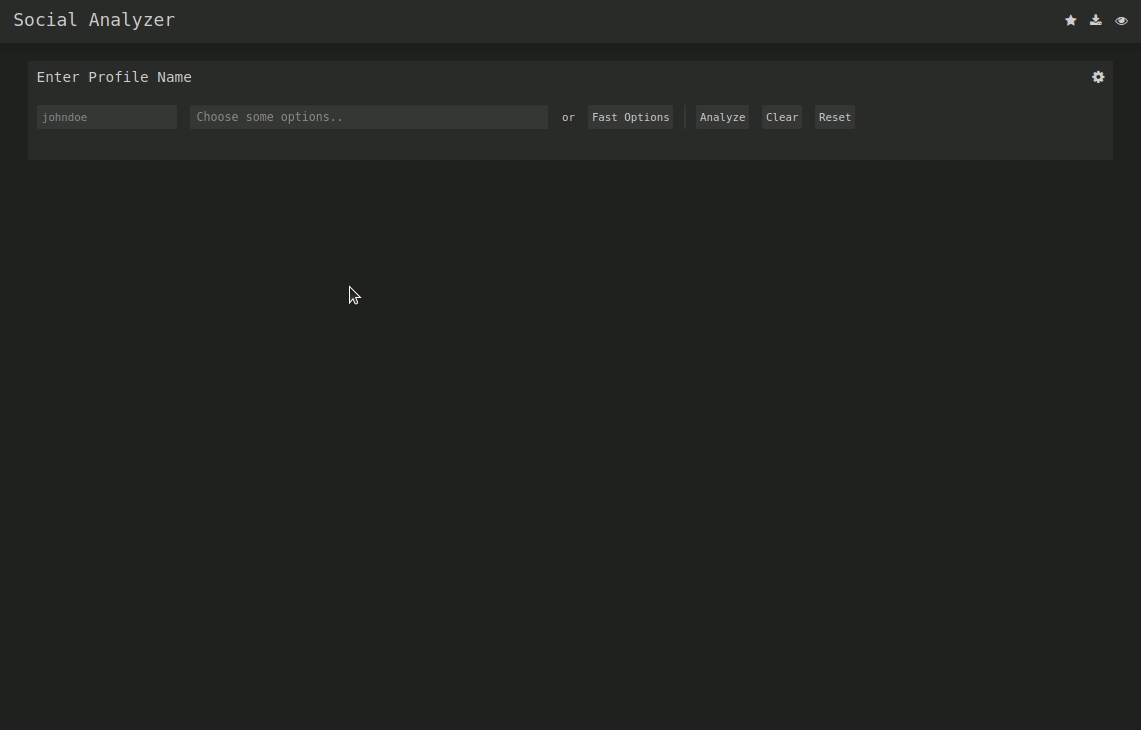
  --username   E.g. johndoe, john_doe or johndoe9999

Optional Arguments:
  --websites   Website or websites separated by space E.g. youtube, tiktok or tumblr
  --mode       Analysis mode E.g.fast -> FindUserProfilesFast, slow -> FindUserProfilesSlow or special -> FindUserProfilesSpecial
  --output     Show the output in the following format: json -> json output for integration or pretty -> prettify the output
  --options    Show the following when a profile is found: link, rate, title or text
  --method     find -> show detected profiles, get -> show all profiles regardless detected or not, both -> combine find & get
  --filter     Filter detected profiles by good, maybe or bad, you can do combine them with comma (good,bad) or use all
  --profiles   Filter profiles by detected, unknown or failed, you can do combine them with comma (detected,failed) or use all
  --extract    Extract profiles, urls & patterns if possible
  --metadata   Extract metadata if possible (pypi QeeqBox OSINT)
  --trim       Trim long strings

Listing websites & detections:
  --list       List all available websites

Setting:
  --headers    Headers as dict
  --logs_dir   Change logs directory
  --timeout    Change timeout between each request
  --silent     Disable output to screen

打开外壳

运行问题

  • 请记住,现有配置文件显示status:goodrate:%100
  • 一些网站返回blockedinvalid<-这是预期的行为
  • 使用代理、VPN、ToR或任何类似方式定期检查可疑配置文件
  • 请勿将FindUserProfilesFast与FindUserProfilesSlow和ShowUserProfilesSlow混合使用
  • 将用户代理更改为最新的用户代理或增加请求之间的随机时间
  • 使用慢速模式(CLI中不可用)以避免遇到阻塞\结果问题

目标

  • 添加通用网站检测(这些需要一些审查,但我将在2021年尝试添加它们)

资源

  • DuckDuckGo API、Google API、NodeJS、bootstrap、选择化、jQuery、维基百科、font-awawed、Selenium-Webdriver&tesseract.js
  • 如果我错过了参考资料或资源,请告诉我!

采访

一些新闻\文章

免责声明\备注

  • 请确保从GitHub下载此工具
  • 这是一个安全项目(将其视为安全项目)
  • 如果您希望将您的网站排除在此项目列表之外,请与我联系
  • 此工具将在本地使用,而不是作为服务使用(它没有任何类型的访问控制)
  • 有关以-private结尾的模块的相关问题,请直接联系我(不要在GitHub上打开问题)

其他项目

Isort-用于对import进行排序的Python实用程序/库

isort 是一个Python的实用程序/库,它会按字母顺序对导入(import)的库进行排序,并自动分组。它提供多种实用方式,包括命令行、Python库和VSCode、Pycharm插件快速分拣你所有的import。

它基于Python 3.6+实现,但也支持格式化Python 2代码

在isort之前:

from my_lib import Object
import os
from my_lib import Object3
from my_lib import Object2
import sys
from third_party import lib15, lib1, lib2, lib3, lib4, lib5, lib6, lib7, lib8, lib9, lib10, lib11, lib12, lib13, lib14
import sys
from __future__ import absolute_import
from third_party import lib3
print("Hey")
print("yo")

排序后:

from __future__ import absolute_import import os
import sys from third_party import (lib1, lib2, lib3, lib4, lib5, lib6, lib7, lib8,
                        lib9, lib10, lib11, lib12, lib13, lib14, lib15)

from my_lib import Object, Object2, Object3 
print("Hey")
print("yo")

安装isort

安装isort非常简单,只需:

pip install isort

安装isort,并提供Requirements.txt支持:

pip install isort[requirements_deprecated_finder]

安装支持管道文件的isort:

pip install isort[pipfile_deprecated_finder]

安装支持两种格式的isort:

pip install isort[requirements_deprecated_finder,pipfile_deprecated_finder]

使用isort

从命令行

要在特定文件上运行,请执行以下操作:

isort mypythonfile.py mypythonfile2.py

要递归应用,请执行以下操作:

isort .

如果globstar已启用,isort .相当于:

isort **/*.py

要查看建议的更改而不应用它们,请执行以下操作:

isort mypythonfile.py --diff

最后,要对项目自动运行isort,仅在未引入语法错误的情况下应用更改:

isort --atomic .

(注意:这在默认情况下是禁用的,因为它阻止isort针对使用不同版本的Python编写的代码运行。)

从Python内部

import isort
isort.file(“pythonfile.py”)

或者:

import isort
sorted_code = isort.code(“import b\nimport a\n)

为您首选的文本编辑器安装isort

已经编写了几个插件,可以在各种文本编辑器中使用isort。您可以找到它们的完整列表on the isort
wiki
此外,我将热情地接受包括其他文本编辑器插件的Pull请求,并在收到通知时为它们添加文档

多行输出模式

您将注意到上面的“MULTI_LINE_OUTPUT”设置。此设置定义当从导入扩展到超过line_length限制并具有12 possible settings

压痕

要更改常量缩进的显示方式-只需使用以下可接受的格式更改缩进属性:

  • 您想要的空间数。例如:4将导致标准的4空格缩进
  • 选项卡
  • 带引号的逐字字符串

例如:

"    "

等于4

对于使用圆括号的导入样式,可以控制是否在上次导入后使用include_trailing_comma选项(默认为False)

智能平衡多行导入

从isort3.1.0开始,添加了对平衡多行导入的支持。启用此功能后,isort会将导入长度动态更改为生成最平衡格网的长度,同时保持在定义的最大导入长度以下

示例:

from __future__ import (absolute_import, division,
                        print_function, unicode_literals)

将会产生,而不是:

from __future__ import (absolute_import, division, print_function,
                        unicode_literals)

要启用此设置,请执行以下操作balanced_wrappingTrue在您的配置中,或将-e选项添加到命令行实用程序中

自定义节和排序

isort提供了配置选项来更改导入在各个部分中的组织、排序或分组方式的几乎每一个方面

Click here有关所有这些选项的概述,请参阅

跳过导入处理(配置之外)

要使isort忽略单个导入,只需在包含文本的导入行末尾添加注释isort:skip

import module  # isort:skip

或者:

from xyz import (abc,  # isort:skip
                 yo,
                 hey)

要使isort跳过整个文件,只需添加isort:skip_file添加到模块的文档字符串:

""" my_module.py
    Best module ever

   isort:skip_file
"""

import b
import a

从多个文件添加或删除导入

可以运行isort或将其配置为自动添加/删除导入

See a complete guide here.

使用isort验证代码

这个--check-only选项

也可以使用isort来验证代码的格式是否正确,方法是使用-c任何包含错误排序和/或格式化导入的文件都将输出到stderr

isort **/*.py -c -v

SUCCESS: /home/timothy/Projects/Open_Source/isort/isort_kate_plugin.py Everything Looks Good!
ERROR: /home/timothy/Projects/Open_Source/isort/isort/isort.py Imports are incorrectly sorted.

可以使用它的一个很好的地方是使用预先提交的git钩子,比如@acdha提供的这个钩子:

https://gist.github.com/acdha/8717683

这有助于在整个项目中确保一定级别的代码质量

Git钩子

isort提供了一个钩子函数,该函数可以集成到Git预提交脚本中,以便在提交之前检查Python代码

More info here.

Setuptools集成

安装后,isort将启用setuptools用于检查项目声明的Python文件的命令

More info here.

把消息传出去

将此徽章放在存储库的顶部,让其他人知道您的项目使用了isort

对于Readme.md:

[![Imports: isort](https://img.shields.io/badge/%20imports-isort-%231674b1?style=flat&labelColor=ef8336)](https://pycqa.github.io/isort/)

或readme.rst:

.. image:: https://img.shields.io/badge/%20imports-isort-%231674b1?style=flat&labelColor=ef8336
    :target: https://pycqa.github.io/isort/

安全联系信息

若要报告安全漏洞,请使用Tidelift security
contact
Tidelift将协调修复和披露

为什么是伊索尔?

isort简单地表示导入排序。它最初名为“sortImports”,但是我厌倦了键入额外的字符,并意识到CamelCase并不是巨蟒

我之所以编写isort,是因为在我曾经工作过的一个组织中,经理有一天来了,他决定所有代码都必须按字母顺序对导入进行排序。代码库很大–他的意思是让我们手工完成。然而,作为一名程序员-我太懒了,不会花8个小时盲目地执行一个函数,但也不会太懒,不会花16个小时让它自动化。我获得了开放源码sortImports的许可,我们在这里:)


Get professionally supported isort with the Tidelift
Subscription

对isort的专业支持是作为Tidelift
Subscription
Tidelift为软件开发团队提供了购买和维护软件的单一来源,并由最了解该技术的专家提供专业级别保证,同时与现有工具无缝集成


谢谢,我希望你觉得isort有用!

~蒂莫西·克罗斯利

Visidata 一种用于发现和整理数据的终端电子表格工具

一种用于浏览和排列表格数据的终端界面

VisiData支持TSV、CSV、SQLite、json、xlsx(Excel)、hdf5和many other formats

平台要求

  • Linux、OS/X或Windows(带WSL)
  • Python 3.6+
  • 某些格式和源需要其他Python模块

安装

要从PyPI安装最新版本,请执行以下操作:


pip3 install visidata

安装尖端设备的步骤develop分公司(无明示或默示的保修):


pip3 install git+https://github.com/saulpw/visidata.git@develop

看见visidata.org/install有关所有可用平台和包管理器的详细说明,请参阅

用法


$ vd <input>
$ <command> | vd

按下Ctrl+Q随时戒烟

还可以使用数百个其他命令和选项;请参阅文档

文档

帮助和支持

如果您有关于VisiData的问题、问题或建议,请create an issue on Github或在#visidata上与我们聊天irc.libera.chat

如果您经常使用VisiData,请support me on Patreon好了!

许可证

中的代码。stable此存储库的分支,包括主vd应用程序、加载器和插件可在GPLv3下使用和重新分发

学分

VisiData由Saul Pwanson构思和开发<vd@saul.pw>

安雅·凯法拉(Anja Kefala)<anja.kefala@gmail.com>维护所有平台的文档和软件包

非常感谢无数其他人contributors,以及那些提供反馈的优秀用户,感谢他们帮助VisiData成为令人敬畏的工具

Tqdm-一个用于Python和CLI的快速、可扩展的进度条

TQDM

tqdm派生自阿拉伯语单词塔卡杜姆(تقدّم)可以是“进步”的意思,在西班牙语中是“我非常爱你”的缩写(德马西亚多)

立即使您的循环显示一个智能进度表-只需用tqdm(iterable),你就完了!

from tqdm import tqdm
for i in tqdm(range(10000)):
    ...

76%|████████████████████████        | 7568/10000 [00:33<00:10, 229.00it/s]

trange(N)还可以用作以下操作的便捷快捷方式tqdm(range(N))

它还可以作为带有管道的模块执行:

$ seq 9999999 | tqdm --bytes | wc -l
75.2MB [00:00, 217MB/s]
9999999

$ tar -zcf - docs/ | tqdm --bytes --total `du -sb docs/ | cut -f1` \
    > backup.tgz
 32%|██████████▍                      | 8.89G/27.9G [00:42<01:31, 223MB/s]

开销很低–每次迭代约60 ns(80 ns,tqdm.gui),并针对性能回归进行单元测试。相比之下,久负盛名的ProgressBar具有800 ns/ITER开销

除了开销低之外,tqdm使用智能算法预测剩余时间并跳过不必要的迭代显示,这在大多数情况下可以忽略不计的开销

tqdm可在任何平台(Linux、Windows、Mac、FreeBSD、NetBSD、Solaris/SunOS)、任何控制台或GUI中运行,并且与IPython/Jupyter笔记本电脑也很友好

tqdm不需要任何依赖项(甚至不需要curses!),只有Python和一个支持carriage return \rline feed \n控制字符


Installation

Latest PyPI stable release


pip install tqdm

Latest development release on GitHub

拉入并安装预发行版devel分支机构:

pip install "git+https://github.com/tqdm/tqdm.git@devel#egg=tqdm"

Latest Conda release

conda install -c conda-forge tqdm

Latest Snapcraft release

有3个频道可供选择:

snap install tqdm  # implies --stable, i.e. latest tagged release
snap install tqdm  --candidate  # master branch
snap install tqdm  --edge  # devel branch

请注意,snap二进制文件仅供CLI使用(而不是import-可用),并自动设置bash制表符完成

Latest Docker release

docker pull tqdm/tqdm
docker run -i --rm tqdm/tqdm --help

Other

还有其他(非官方的)地方tqdm可以下载,特别是对于CLI使用:


Changelog

所有更改的列表可在GitHub的版本上获得:,在wiki,或在website

Usage

tqdm是非常多才多艺的,可以有多种用途。下面给出了三个主要的原因

Iterable-based

包装tqdm()围绕任何可迭代:

from tqdm import tqdm
from time import sleep

text = ""
for char in tqdm(["a", "b", "c", "d"]):
    sleep(0.25)
    text = text + char

trange(i)是一个特殊的优化实例tqdm(range(i))

from tqdm import trange

for i in trange(100):
    sleep(0.01)

循环外的实例化允许手动控制tqdm()

pbar = tqdm(["a", "b", "c", "d"])
for char in pbar:
    sleep(0.25)
    pbar.set_description("Processing %s" % char)

Manual

手动控制tqdm()使用with声明:

with tqdm(total=100) as pbar:
    for i in range(10):
        sleep(0.1)
        pbar.update(10)

如果可选变量total(或使用可迭代的len()),则显示预测统计信息

with也是可选的(您可以直接将tqdm()赋给一个变量,但在这种情况下,不要忘记delclose()在结尾处:

pbar = tqdm(total=100)
for i in range(10):
    sleep(0.1)
    pbar.update(10)
pbar.close()

Module

也许最奇妙的用法就是tqdm是在脚本中还是在命令行上。简单地插入tqdm(或python -m tqdm)之间的管道将通过所有stdinstdout将进度打印到时stderr

下面的示例演示了如何计算当前目录中所有Python文件中的行数,其中包括计时信息

$ time find . -name '*.py' -type f -exec cat \{} \; | wc -l
857365

real    0m3.458s
user    0m0.274s
sys     0m3.325s

$ time find . -name '*.py' -type f -exec cat \{} \; | tqdm | wc -l
857366it [00:03, 246471.31it/s]
857365

real    0m3.585s
user    0m0.862s
sys     0m3.358s

请注意,通常的论点是tqdm也可以指定

$ find . -name '*.py' -type f -exec cat \{} \; |
    tqdm --unit loc --unit_scale --total 857366 >> /dev/null
100%|█████████████████████████████████| 857K/857K [00:04<00:00, 246Kloc/s]

备份一个大目录吗?

$ tar -zcf - docs/ | tqdm --bytes --total `du -sb docs/ | cut -f1` \
  > backup.tgz
 44%|██████████████▊                   | 153M/352M [00:14<00:18, 11.0MB/s]

这还可以进一步美化:

$ BYTES="$(du -sb docs/ | cut -f1)"
$ tar -cf - docs/ \
  | tqdm --bytes --total "$BYTES" --desc Processing | gzip \
  | tqdm --bytes --total "$BYTES" --desc Compressed --position 1 \
  > ~/backup.tgz
Processing: 100%|██████████████████████| 352M/352M [00:14<00:00, 30.2MB/s]
Compressed:  42%|█████████▎            | 148M/352M [00:14<00:19, 10.9MB/s]

或使用7-zip在文件级完成:

$ 7z a -bd -r backup.7z docs/ | grep Compressing \
  | tqdm --total $(find docs/ -type f | wc -l) --unit files \
  | grep -v Compressing
100%|██████████████████████████▉| 15327/15327 [01:00<00:00, 712.96files/s]

已经输出基本进度信息的现有CLI程序将受益于tqdm%s--update--update_to标志:

$ seq 3 0.1 5 | tqdm --total 5 --update_to --null
100%|████████████████████████████████████| 5.0/5 [00:00<00:00, 9673.21it/s]
$ seq 10 | tqdm --update --null  # 1 + 2 + ... + 10 = 55 iterations
55it [00:00, 90006.52it/s]

FAQ and Known Issues

最常见的问题与多行输出过多有关,而不是整齐的单行进度条

  • 一般控制台:需要回车支持(CR\r)
  • 嵌套进度条:
    • 一般控制台:需要支持将光标上移到上一行。例如,IDLEConEmuPyCharm(亦请参阅herehere,以及here)缺乏全力支持
    • Windows:另外可能需要Python模块colorama要确保嵌套条位于各自的行内,请执行以下操作
  • Unicode:
    • 报告支持Unicode的环境将具有稳定、平滑的进度条。后备方案是一个ascii-仅限栏
    • Windows控制台通常只部分支持Unicode,因此often require explicit ascii=True(亦请参阅here)。这是因为普通宽度的Unicode字符错误地显示为“宽”,或者某些Unicode字符未呈现
  • 包裹生成器:
    • 生成器包装函数倾向于隐藏可迭代的长度tqdm不会
    • 替换tqdm(enumerate(...))使用enumerate(tqdm(...))tqdm(enumerate(x), total=len(x), ...)同样的道理也适用于numpy.ndenumerate
    • 替换tqdm(zip(a, b))使用zip(tqdm(a), b)甚至是zip(tqdm(a), tqdm(b))
    • 同样的道理也适用于itertools
    • 一些有用的方便函数可以在下面的tqdm.contrib
  • Hanging pipes in python2:使用时tqdm在CLI上,您可能需要使用Python 3.5+才能正确缓冲
  • No intermediate output in docker-compose:使用docker-compose run而不是docker-compose uptty: true

如果您遇到任何其他困难,请浏览并归档

Documentation

(自2016年5月19日起)

class tqdm():
  """
  Decorate an iterable object, returning an iterator which acts exactly
  like the original iterable, but prints a dynamically updating
  progressbar every time a value is requested.
  """

  def __init__(self, iterable=None, desc=None, total=None, leave=True,
               file=None, ncols=None, mininterval=0.1,
               maxinterval=10.0, miniters=None, ascii=None, disable=False,
               unit='it', unit_scale=False, dynamic_ncols=False,
               smoothing=0.3, bar_format=None, initial=0, position=None,
               postfix=None, unit_divisor=1000):

Parameters

  • 可迭代的:可迭代,可选
    可重复使用进度条进行装饰。保留为空可手动管理更新
  • 说明:字符串,可选
    进度栏的前缀
  • 总计:整型或浮点型,可选
    预期迭代次数。如果未指定,则在可能的情况下使用len(可迭代)。如果为FLOAT(“inf”)或作为最后手段,则仅显示基本进度统计信息(无ETA,无进度条)。如果gui为True并且此参数需要后续更新,请指定初始任意大正数,例如9e9
  • 离开吧:布尔值,可选
    如果为[default:true],则在迭代终止时保留进度条的所有痕迹。如果None,只有在以下情况下才会离开position0
  • 文件:io.TextIOWrapperio.StringIO,可选
    指定输出进度消息的位置(默认值:sys.stderr)。用途file.write(str)file.flush()方法。有关编码信息,请参见write_bytes
  • 乙二醇:整型,可选
    整个输出消息的宽度。如果指定,则动态调整进度条的大小以保持在此范围内。如果未指定,则尝试使用环境宽度。后备宽度为10米,对计数器和统计数据没有限制。如果为0,则不打印任何仪表(仅打印统计数据)
  • 最小间隔:浮动,可选
    最小进度显示更新间隔[默认值:0.1]秒
  • 最大间隔:浮动,可选
    最大进度显示更新间隔[默认值:10]秒。自动调整miniters与…相对应mininterval在长时间显示更新延迟之后。仅在以下情况下才有效dynamic_miniters或者启用了监视器线程
  • 小型矿车:整型或浮点型,可选
    最小进度显示更新间隔,以迭代为单位。如果为0且dynamic_miniters,将自动调整为等于mininterval(CPU效率更高,适用于紧密循环)。如果>0,将跳过指定迭代次数的显示。调整此选项,然后mininterval以获得非常有效的循环。如果快速迭代和慢速迭代(网络、跳过项目等)的进度都不稳定,则应该将miniters设置为1
  • ASCII:布尔值或字符串,可选
    如果未指定或为False,则使用Unicode(平滑块)填充仪表。备用方法是使用ASCII码字符“123456789#”
  • 禁用:布尔值,可选
    是否禁用整个进度栏包装[默认值:false]。如果设置为None,则在非TTY上禁用
  • 单位:字符串,可选
    将用于定义每个迭代的单位的字符串[默认值:it]
  • 单位_刻度:Bool、int或Float,可选
    如果为1或True,则迭代次数将自动减少/缩放,并将添加遵循国际单位制标准的公制前缀(千、兆等)[默认值:FALSE]。如果有任何其他非零数,将缩放totaln
  • 动态参数(_N):布尔值,可选
    如果设置,则会不断更改ncolsnrows到环境(允许调整窗口大小)[默认值:FALSE]
  • 平滑:浮动,可选
    速度估计的指数移动平均平滑系数(在GUI模式中忽略)。范围从0(平均速度)到1(当前/瞬时速度)[默认值:0.3]
  • 条形图格式(_F):字符串,可选
    指定自定义条形字符串格式。可能会影响性能。[默认值:‘{l_bar}{bar}{r_bar}’],其中l_bar=‘{desc}:{percentage:3.0f}%|’,r_bar=‘|{n_fmt}/{total_fmt}[{elapsed}<{reaving},’{rate_fmt}{postfix}]‘’可能的变量:l_bar,bar,r_bar,n,n_fmt,total,total_fmt,百分比,已用rate_noinv、rate_noinv_fmt、rate_inv、rate_inv_fmt、后缀、unit_ditor、剩余、剩余_s、eta。请注意,如果{desc}为空,则会在{desc}之后自动删除尾随的“:”
  • 首字母:整型或浮点型,可选
    初始计数器值。重新启动进度条时非常有用[默认值:0]。如果使用浮点,请考虑指定{n:.3f}或类似于bar_format,或指定unit_scale
  • 职位:整型,可选
    如果未指定,请指定自动打印此条形图的行偏移量(从0开始)。一次管理多个条形图非常有用(例如,从线程)
  • 后缀:DICT或*,可选
    指定要在条末尾显示的其他统计信息。呼叫set_postfix(**postfix)如果可能(DICT)
  • 单位_除数:浮动,可选
    [默认值:1000],除非忽略unit_scale是真的吗?
  • 写入字节(_B):布尔值,可选
    如果(默认值:无)和file未指定,则将使用Python 2写入字节。如果True还将写入字节。在所有其他情况下,将默认为Unicode
  • 锁定参数(_A):元组,可选
    已传递给refresh用于中间输出(初始化、迭代和更新)
  • n行:整型,可选
    屏幕高度。如果指定,则隐藏此边界之外的嵌套条。如果未指定,则尝试使用环境高度。退而求其次是20
  • 颜色:字符串,可选
    条形图颜色(例如“绿色”、“#00ff00”)
  • 延迟:浮动,可选
    在经过[默认值:0]秒之前不显示

Extra CLI Options

  • 神志不清:CHR,可选
    分隔字符[默认值:‘n’]。使用“0”表示NULL。注:在Windows系统上,Python将‘n’转换为‘rn’
  • buf_size:整型,可选
    字符串缓冲区大小(以字节为单位)[默认值:256]在以下情况下使用delim已指定
  • 字节数:布尔值,可选
    如果为true,将计算字节数,忽略delim和Defaultunit_scale为了真的,unit_divisor设置为1024,并且unit到“B”
  • T形三通:布尔值,可选
    如果为true,则通过stdin对两个人都是stderrstdout
  • 更新:布尔值,可选
    如果为true,则将输入视为新经过的迭代,即要传递到的数字update()请注意,这很慢(~2e5 it/s),因为每个输入都必须解码为数字
  • 更新目标(_T):布尔值,可选
    如果为true,则将输入视为已用迭代总数,即要分配给的数字self.n请注意,这很慢(~2e5 it/s),因为每个输入都必须解码为数字
  • 空:布尔值,可选
    如果为true,将丢弃输入(无标准输出)
  • 人工路径:字符串,可选
    要安装tqdm手册页的目录
  • 压缩路径:字符串,可选
    放置tqdm完成的目录
  • 日志:字符串,可选
    严重|致命|错误|警告(ING)|[默认值:‘INFO’]|DEBUG|NOTSET

Returns

  • 输出:修饰迭代器
class tqdm():
  def update(self, n=1):
      """
      Manually update the progress bar, useful for streams
      such as reading files.
      E.g.:
      >>> t = tqdm(total=filesize) # Initialise
      >>> for current_buffer in stream:
      ...    ...
      ...    t.update(len(current_buffer))
      >>> t.close()
      The last line is highly recommended, but possibly not necessary if
      ``t.update()`` will be called in such a way that ``filesize`` will be
      exactly reached and printed.

      Parameters
      ----------
      n  : int or float, optional
          Increment to add to the internal counter of iterations
          [default: 1]. If using float, consider specifying ``{n:.3f}``
          or similar in ``bar_format``, or specifying ``unit_scale``.

      Returns
      -------
      out  : bool or None
          True if a ``display()`` was triggered.
      """

  def close(self):
      """Cleanup and (if leave=False) close the progressbar."""

  def clear(self, nomove=False):
      """Clear current bar display."""

  def refresh(self):
      """
      Force refresh the display of this bar.

      Parameters
      ----------
      nolock  : bool, optional
          If ``True``, does not lock.
          If [default: ``False``]: calls ``acquire()`` on internal lock.
      lock_args  : tuple, optional
          Passed to internal lock's ``acquire()``.
          If specified, will only ``display()`` if ``acquire()`` returns ``True``.
      """

  def unpause(self):
      """Restart tqdm timer from last print time."""

  def reset(self, total=None):
      """
      Resets to 0 iterations for repeated use.

      Consider combining with ``leave=True``.

      Parameters
      ----------
      total  : int or float, optional. Total to use for the new bar.
      """

  def set_description(self, desc=None, refresh=True):
      """
      Set/modify description of the progress bar.

      Parameters
      ----------
      desc  : str, optional
      refresh  : bool, optional
          Forces refresh [default: True].
      """

  def set_postfix(self, ordered_dict=None, refresh=True, **tqdm_kwargs):
      """
      Set/modify postfix (additional stats)
      with automatic formatting based on datatype.

      Parameters
      ----------
      ordered_dict  : dict or OrderedDict, optional
      refresh  : bool, optional
          Forces refresh [default: True].
      kwargs  : dict, optional
      """

  @classmethod
  def write(cls, s, file=sys.stdout, end="\n"):
      """Print a message via tqdm (without overlap with bars)."""

  @property
  def format_dict(self):
      """Public API for read-only member access."""

  def display(self, msg=None, pos=None):
      """
      Use ``self.sp`` to display ``msg`` in the specified ``pos``.

      Consider overloading this function when inheriting to use e.g.:
      ``self.some_frontend(**self.format_dict)`` instead of ``self.sp``.

      Parameters
      ----------
      msg  : str, optional. What to display (default: ``repr(self)``).
      pos  : int, optional. Position to ``moveto``
        (default: ``abs(self.pos)``).
      """

  @classmethod
  @contextmanager
  def wrapattr(cls, stream, method, total=None, bytes=True, **tqdm_kwargs):
      """
      stream  : file-like object.
      method  : str, "read" or "write". The result of ``read()`` and
          the first argument of ``write()`` should have a ``len()``.

      >>> with tqdm.wrapattr(file_obj, "read", total=file_obj.size) as fobj:
      ...     while True:
      ...         chunk = fobj.read(chunk_size)
      ...         if not chunk:
      ...             break
      """

  @classmethod
  def pandas(cls, *targs, **tqdm_kwargs):
      """Registers the current `tqdm` class with `pandas`."""

def trange(*args, **tqdm_kwargs):
    """
    A shortcut for `tqdm(xrange(*args), **tqdm_kwargs)`.
    On Python3+, `range` is used instead of `xrange`.
    """

Convenience Functions

def tqdm.contrib.tenumerate(iterable, start=0, total=None,
                            tqdm_class=tqdm.auto.tqdm, **tqdm_kwargs):
    """Equivalent of `numpy.ndenumerate` or builtin `enumerate`."""

def tqdm.contrib.tzip(iter1, *iter2plus, **tqdm_kwargs):
    """Equivalent of builtin `zip`."""

def tqdm.contrib.tmap(function, *sequences, **tqdm_kwargs):
    """Equivalent of builtin `map`."""

Submodules

class tqdm.notebook.tqdm(tqdm.tqdm):
    """IPython/Jupyter Notebook widget."""

class tqdm.auto.tqdm(tqdm.tqdm):
    """Automatically chooses beween `tqdm.notebook` and `tqdm.tqdm`."""

class tqdm.asyncio.tqdm(tqdm.tqdm):
  """Asynchronous version."""
  @classmethod
  def as_completed(cls, fs, *, loop=None, timeout=None, total=None,
                   **tqdm_kwargs):
      """Wrapper for `asyncio.as_completed`."""

class tqdm.gui.tqdm(tqdm.tqdm):
    """Matplotlib GUI version."""

class tqdm.tk.tqdm(tqdm.tqdm):
    """Tkinter GUI version."""

class tqdm.rich.tqdm(tqdm.tqdm):
    """`rich.progress` version."""

class tqdm.keras.TqdmCallback(keras.callbacks.Callback):
    """Keras callback for epoch and batch progress."""

class tqdm.dask.TqdmCallback(dask.callbacks.Callback):
    """Dask callback for task progress."""

contrib

这个tqdm.contrib软件包还包含实验模块:

  • tqdm.contrib.itertools:周围有薄薄的包装纸itertools
  • tqdm.contrib.concurrent:周围有薄薄的包装纸concurrent.futures
  • tqdm.contrib.discord:发布到Discord机器人
  • tqdm.contrib.telegram:发布到Telegram机器人
  • tqdm.contrib.bells:自动启用所有可选功能
    • autopandasdiscordtelegram

Examples and Advanced Usage

Description and additional stats

自定义信息可以在上动态显示和更新tqdm带有条形图的条形图descpostfix参数:

from tqdm import tqdm, trange
from random import random, randint
from time import sleep

with trange(10) as t:
    for i in t:
        # Description will be displayed on the left
        t.set_description('GEN %i' % i)
        # Postfix will be displayed on the right,
        # formatted automatically based on argument's datatype
        t.set_postfix(loss=random(), gen=randint(1,999), str='h',
                      lst=[1, 2])
        sleep(0.1)

with tqdm(total=10, bar_format="{postfix[0]} {postfix[1][value]:>8.2g}",
          postfix=["Batch", dict(value=0)]) as t:
    for i in range(10):
        sleep(0.1)
        t.postfix[1]["value"] = i / 2
        t.update()

使用时要记住的要点{postfix[...]}bar_format字符串:

  • postfix还需要以兼容格式作为初始参数传递,并且
  • postfix将自动转换为字符串(如果它是dict-类物体。要防止此行为,请在键不是字符串的字典中插入额外的项

附加内容bar_format参数也可以通过重写format_dict,并且可以使用以下命令修改栏本身ascii

from tqdm import tqdm
class TqdmExtraFormat(tqdm):
    """Provides a `total_time` format parameter"""
    @property
    def format_dict(self):
        d = super(TqdmExtraFormat, self).format_dict
        total_time = d["elapsed"] * (d["total"] or 0) / max(d["n"], 1)
        d.update(total_time=self.format_interval(total_time) + " in total")
        return d

for i in TqdmExtraFormat(
      range(9), ascii=" .oO0",
      bar_format="{total_time}: {percentage:.0f}%|{bar}{r_bar}"):
    if i == 4:
        break
00:00 in total: 44%|0000.     | 4/9 [00:00<00:00, 962.93it/s]

请注意,{bar}还支持格式说明符[width][type]

  • width
    • 未指定(默认):自动填充ncols
    • int >= 0:固定宽度替代ncols逻辑
    • int < 0:从自动缺省值中减去
  • type
    • a:ASCII(ascii=True覆盖)
    • u:unicode(ascii=False覆盖)
    • b:空白(ascii=" "覆盖)

这意味着可以使用以下方法创建具有右对齐文本的固定栏:bar_format="{l_bar}{bar:10}|{bar:-10b}right-justified"

Nested progress bars

tqdm支持嵌套进度条。下面是一个示例:

from tqdm.auto import trange
from time import sleep

for i in trange(4, desc='1st loop'):
    for j in trange(5, desc='2nd loop'):
        for k in trange(50, desc='3rd loop', leave=False):
            sleep(0.01)

要手动控制定位(例如,用于多处理),您可以指定position=n哪里n=0对于最外面的酒吧,n=1下一个,以此类推。不过,最好还是检查一下tqdm无需手动即可工作position第一

from time import sleep
from tqdm import trange, tqdm
from multiprocessing import Pool, RLock, freeze_support

L = list(range(9))

def progresser(n):
    interval = 0.001 / (n + 2)
    total = 5000
    text = "#{}, est. {:<04.2}s".format(n, interval * total)
    for _ in trange(total, desc=text, position=n):
        sleep(interval)

if __name__ == '__main__':
    freeze_support()  # for Windows support
    tqdm.set_lock(RLock())  # for managing output contention
    p = Pool(initializer=tqdm.set_lock, initargs=(tqdm.get_lock(),))
    p.map(progresser, L)

请注意,在Python3中,tqdm.write是否线程安全:

from time import sleep
from tqdm import tqdm, trange
from concurrent.futures import ThreadPoolExecutor

L = list(range(9))

def progresser(n):
    interval = 0.001 / (n + 2)
    total = 5000
    text = "#{}, est. {:<04.2}s".format(n, interval * total)
    for _ in trange(total, desc=text):
        sleep(interval)
    if n == 6:
        tqdm.write("n == 6 completed.")
        tqdm.write("`tqdm.write()` is thread-safe in py3!")

if __name__ == '__main__':
    with ThreadPoolExecutor() as p:
        p.map(progresser, L)

Hooks and callbacks

tqdm可以轻松支持回调/挂钩和手动更新。下面是一个包含以下内容的示例urllib

“urllib.urlsearche“文档

[.]
如果存在,将调用一次钩子函数
关于网络连接的建立和每次挡路阅读后的一次
之后。将向挂钩传递三个参数;块计数
到目前为止已传输的挡路大小(以字节为单位)和文件的总大小
[.]
import urllib, os
from tqdm import tqdm
urllib = getattr(urllib, 'request', urllib)

class TqdmUpTo(tqdm):
    """Provides `update_to(n)` which uses `tqdm.update(delta_n)`."""
    def update_to(self, b=1, bsize=1, tsize=None):
        """
        b  : int, optional
            Number of blocks transferred so far [default: 1].
        bsize  : int, optional
            Size of each block (in tqdm units) [default: 1].
        tsize  : int, optional
            Total size (in tqdm units). If [default: None] remains unchanged.
        """
        if tsize is not None:
            self.total = tsize
        return self.update(b * bsize - self.n)  # also sets self.n = b * bsize

eg_link = "https://caspersci.uk.to/matryoshka.zip"
with TqdmUpTo(unit='B', unit_scale=True, unit_divisor=1024, miniters=1,
              desc=eg_link.split('/')[-1]) as t:  # all optional kwargs
    urllib.urlretrieve(eg_link, filename=os.devnull,
                       reporthook=t.update_to, data=None)
    t.total = t.n

灵感来自twine#242中的功能替代examples/tqdm_wget.py

建议使用miniters=1每当迭代速度存在潜在较大差异时(例如,通过补丁连接下载文件)

包装读/写方法

要通过类似文件的对象测量吞吐量,请执行以下操作readwrite方法,使用CallbackIOWrapper

from tqdm.auto import tqdm
from tqdm.utils import CallbackIOWrapper

with tqdm(total=file_obj.size,
          unit='B', unit_scale=True, unit_divisor=1024) as t:
    fobj = CallbackIOWrapper(t.update, file_obj, "read")
    while True:
        chunk = fobj.read(chunk_size)
        if not chunk:
            break
    t.reset()
    # ... continue to use `t` for something else

或者,使用更简单的wrapattr便利函数,该函数将压缩两个urllibCallbackIOWrapper下面是示例:

import urllib, os
from tqdm import tqdm

eg_link = "https://caspersci.uk.to/matryoshka.zip"
response = getattr(urllib, 'request', urllib).urlopen(eg_link)
with tqdm.wrapattr(open(os.devnull, "wb"), "write",
                   miniters=1, desc=eg_link.split('/')[-1],
                   total=getattr(response, 'length', None)) as fout:
    for chunk in response:
        fout.write(chunk)

这个requests等价物几乎完全相同:

import requests, os
from tqdm import tqdm

eg_link = "https://caspersci.uk.to/matryoshka.zip"
response = requests.get(eg_link, stream=True)
with tqdm.wrapattr(open(os.devnull, "wb"), "write",
                   miniters=1, desc=eg_link.split('/')[-1],
                   total=int(response.headers.get('content-length', 0))) as fout:
    for chunk in response.iter_content(chunk_size=4096):
        fout.write(chunk)

自定义回调

tqdm以智能地跳过不必要的显示而闻名。要使自定义回调利用这一点,只需使用update()这设置为True如果一个display()已被触发

from tqdm.auto import tqdm as std_tqdm

def external_callback(*args, **kwargs):
    ...

class TqdmExt(std_tqdm):
    def update(self, n=1):
        displayed = super(TqdmExt, self).update(n):
        if displayed:
            external_callback(**self.format_dict)
        return displayed

asyncio

请注意,break当前未被异步迭代器捕获。这意味着tqdm在这种情况下,无法自行清理:

from tqdm.asyncio import tqdm

async for i in tqdm(range(9)):
    if i == 2:
        break

取而代之的是,或者调用pbar.close()手动或使用上下文管理器语法:

from tqdm.asyncio import tqdm

with tqdm(range(9)) as pbar:
    async for i in pbar:
        if i == 2:
            break

Pandas Integration

由于大众的需求,我们增加了对pandas–这里有一个例子DataFrame.progress_applyDataFrameGroupBy.progress_apply

import pandas as pd
import numpy as np
from tqdm import tqdm

df = pd.DataFrame(np.random.randint(0, 100, (100000, 6)))

# Register `pandas.progress_apply` and `pandas.Series.map_apply` with `tqdm`
# (can use `tqdm.gui.tqdm`, `tqdm.notebook.tqdm`, optional kwargs, etc.)
tqdm.pandas(desc="my bar!")

# Now you can use `progress_apply` instead of `apply`
# and `progress_map` instead of `map`
df.progress_apply(lambda x: x**2)
# can also groupby:
# df.groupby(0).progress_apply(lambda x: x**2)

如果您对这是如何工作的(以及如何为您自己的回调修改它)感兴趣,请参阅examples文件夹或导入模块,然后运行help()

Keras Integration

一个keras也可以回调:

from tqdm.keras import TqdmCallback

...

model.fit(..., verbose=0, callbacks=[TqdmCallback()])

Dask Integration

一个dask也可以回调:

from tqdm.dask import TqdmCallback

with TqdmCallback(desc="compute"):
    ...
    arr.compute()

# or use callback globally
cb = TqdmCallback(desc="global")
cb.register()
arr.compute()

IPython/Jupyter Integration

IPython/Jupyter通过tqdm.notebook子模块:

from tqdm.notebook import trange, tqdm
from time import sleep

for i in trange(3, desc='1st loop'):
    for j in tqdm(range(100), desc='2nd loop'):
        sleep(0.01)

除了……之外tqdm功能方面,该子模块提供原生Jupyter小部件(与IPythonv1-v4和Jupyter兼容)、完全工作的嵌套条和颜色提示(蓝色:正常、绿色:已完成、红色:错误/中断、浅蓝色:无ETA);如下所示


这个notebook版本支持总宽度的百分比或像素(例如:ncols='100%'ncols='480px')

也可以让tqdm自动选择控制台或笔记本电脑版本,方法是使用autonotebook子模块:

from tqdm.autonotebook import tqdm
tqdm.pandas()

请注意,这将发出一个TqdmExperimentalWarning如果在笔记本中运行,因为它不能区分jupyter notebookjupyter console使用auto而不是autonotebook要取消显示此警告,请执行以下操作

请注意,笔记本将在创建它的单元格中显示该条。这可能是与使用它的单元格不同的单元格。如果这也不是我们想要的,

  • 将栏的创建延迟到必须显示它的单元格,或者
  • 使用创建条形图display=False,并且在稍后的蜂窝呼叫中display(bar.container)
from tqdm.notebook import tqdm
pbar = tqdm(..., display=False)
# different cell
display(pbar.container)

这个keras回调有一个display()同样可以使用的方法:

from tqdm.keras import TqdmCallback
cbk = TqdmCallback(display=False)
# different cell
cbk.display()
model.fit(..., verbose=0, callbacks=[cbk])

另一种可能是拥有一个不断重复使用的条(靠近笔记本顶部)(使用reset()而不是close())。因此,笔记本版本(与CLI版本不同)不会自动调用close()在此基础上Exception

from tqdm.notebook import tqdm
pbar = tqdm()
# different cell
iterable = range(100)
pbar.reset(total=len(iterable))  # initialise with new `total`
for i in iterable:
    pbar.update()
pbar.refresh()  # force print final status but don't `close()`

Custom Integration

要更改默认参数(如进行dynamic_ncols=True),只需使用内置的Python魔术:

from functools import partial
from tqdm import tqdm as std_tqdm
tqdm = partial(std_tqdm, dynamic_ncols=True)

要进一步自定义,请参见tqdm可以从继承以创建自定义回调(与TqdmUpTo示例above)或用于自定义前端(例如,诸如笔记本或绘图包之类的GUI)。在后一种情况下:

  1. def __init__()要呼叫,请执行以下操作super().__init__(..., gui=True)禁用端子的步骤status_printer创作
  2. 重新定义:close()clear()display()

考虑超载display()使用,例如,使用self.frontend(**self.format_dict)而不是self.sp(repr(self))

继承的一些子模块示例:

Dynamic Monitor/Meter

您可以使用tqdm作为一个不是单调递增的韵律。这可能是因为n减少(例如CPU使用情况监视器)或total变化

递归搜索文件就是一个例子。这个total是到目前为止找到的对象数,而n是属于文件(而不是文件夹)的那些对象的数量:

from tqdm import tqdm
import os.path

def find_files_recursively(path, show_progress=True):
    files = []
    # total=1 assumes `path` is a file
    t = tqdm(total=1, unit="file", disable=not show_progress)
    if not os.path.exists(path):
        raise IOError("Cannot find:" + path)

    def append_found_file(f):
        files.append(f)
        t.update()

    def list_found_dir(path):
        """returns os.listdir(path) assuming os.path.isdir(path)"""
        listing = os.listdir(path)
        # subtract 1 since a "file" we found was actually this directory
        t.total += len(listing) - 1
        # fancy way to give info without forcing a refresh
        t.set_postfix(dir=path[-10:], refresh=False)
        t.update(0)  # may trigger a refresh
        return listing

    def recursively_search(path):
        if os.path.isdir(path):
            for f in list_found_dir(path):
                recursively_search(os.path.join(path, f))
        else:
            append_found_file(path)

    recursively_search(path)
    t.set_postfix(dir=path)
    t.close()
    return files

使用update(0)是一种方便的方式来让tqdm决定何时触发显示刷新以避免控制台垃圾邮件

Writing messages

这是一项正在进行的工作(请参见#737)

因为tqdm使用简单的打印机制显示进度条,您不应该在终端中使用print()当进度条打开时

在终端中写入消息而不与其发生任何冲突tqdm条形图显示,a.write()提供了一种方法:

from tqdm.auto import tqdm, trange
from time import sleep

bar = trange(10)
for i in bar:
    # Print using tqdm class method .write()
    sleep(0.1)
    if not (i % 3):
        tqdm.write("Done task %i" % i)
    # Can also use bar.write()

默认情况下,这将打印到标准输出sys.stdout但是您可以使用file论点。例如,这可用于将写入日志文件或类的消息重定向

Redirecting writing

如果使用可以将消息打印到控制台的库,请通过替换print()使用tqdm.write()可能不是我们想要的。在这种情况下,重定向sys.stdouttqdm.write()是一种选择

要重定向,请执行以下操作sys.stdout,创建一个类似文件的类,该类将把任何输入字符串写入tqdm.write(),并提供参数file=sys.stdout, dynamic_ncols=True

下面给出了一个可重用的规范示例:

from time import sleep
import contextlib
import sys
from tqdm import tqdm
from tqdm.contrib import DummyTqdmFile


@contextlib.contextmanager
def std_out_err_redirect_tqdm():
    orig_out_err = sys.stdout, sys.stderr
    try:
        sys.stdout, sys.stderr = map(DummyTqdmFile, orig_out_err)
        yield orig_out_err[0]
    # Relay exceptions
    except Exception as exc:
        raise exc
    # Always restore sys.stdout/err if necessary
    finally:
        sys.stdout, sys.stderr = orig_out_err

def some_fun(i):
    print("Fee, fi, fo,".split()[i])

# Redirect stdout to tqdm.write() (don't forget the `as save_stdout`)
with std_out_err_redirect_tqdm() as orig_stdout:
    # tqdm needs the original stdout
    # and dynamic_ncols=True to autodetect console width
    for i in tqdm(range(3), file=orig_stdout, dynamic_ncols=True):
        sleep(.5)
        some_fun(i)

# After the `with`, printing is restored
print("Done!")

Redirecting logging

类似于sys.stdout/sys.stderr如上所述,控制台logging也可以重定向到tqdm.write()

警告:如果还重定向sys.stdout/sys.stderr,请务必重定向logging如果需要,先来

中提供了帮助器方法tqdm.contrib.logging例如:

import logging
from tqdm import trange
from tqdm.contrib.logging import logging_redirect_tqdm

LOG = logging.getLogger(__name__)

if __name__ == '__main__':
    logging.basicConfig(level=logging.INFO)
    with logging_redirect_tqdm():
        for i in trange(9):
            if i == 4:
                LOG.info("console logging redirected to `tqdm.write()`")
    # logging restored

Monitoring thread, intervals and miniters

tqdm实施一些技巧来提高效率和降低管理费用

  • 避免不必要的频繁条刷新:mininterval定义每次刷新之间等待的时间。tqdm始终在后台更新,但它将仅在mininterval
  • 减少检查系统时钟/时间的调用次数
  • mininterval比起配置更直观miniters巧妙的调整系统dynamic_miniters将自动调整miniters与时间相适应的迭代次数mininterval从本质上讲,tqdm将在不实际检查时间的情况下检查是否到了打印时间。通过手动设置,仍可绕过此行为miniters

但是,请考虑快速迭代和慢速迭代相结合的情况。在几次快速迭代之后,dynamic_miniters将设置miniters变成了一个大数目。当迭代速率随后减慢时,miniters将保持较大,从而降低显示更新频率。要解决此问题,请执行以下操作:

  • maxinterval定义显示刷新之间的最长时间。并发监视线程检查过期的更新,并在必要时强制更新

监视线程不应该有明显的开销,并且默认情况下保证至少每10秒更新一次。该值可以通过设置monitor_interval任何tqdm实例(即t = tqdm.tqdm(...); t.monitor_interval = 2)。可以通过设置在应用程序范围内禁用监视线程tqdm.tqdm.monitor_interval = 0在实例化任何tqdm钢筋

Merch

你可以买到tqdm branded merch现在!

Contributions

所有源代码都托管在GitHub欢迎投稿

请参阅CONTRIBUTING有关详细信息,请参阅文件

做出重大贡献的开发人员,按SLOC(幸存的代码行,git fame-wMC --excl '\.(png|gif|jpg)$'),包括:

名字 ID号 SLOC 注意事项
卡斯珀·达·科斯塔-路易斯 casperdcl ~81% 主要维护人员
斯蒂芬·拉罗克 lrq3000 ~10% 团队成员
马丁·祖格诺尼 martinzugnoni ~3% 他说:
理查德·谢里登 richardsheridan ~1% 他说:
陈广硕 chengs ~1% 他说:
凯尔·阿尔滕多夫 altendky <1% 他说:
马修·史蒂文斯 mjstevens777 <1% 他说:
哈德琳·玛丽 hadim <1% 团队成员
伊万·伊万诺夫 obiwanus <1% 他说:
丹尼尔·潘特莱特 danielpanteleit <1% 他说:
乔纳斯·哈格 jonashaag <1% 他说:
詹姆斯·E·金三世 jeking3 <1% 他说:
诺姆·约拉夫-拉斐尔 noamraph <1% 原作者
米哈伊尔·科罗博夫 kmike <1% 团队成员

Ports to Other Languages

有关列表,请访问this wiki page

LICENCE

开源(OSI批准):

引文信息:

(自2016年5月19日起)

Python-fire 一个用于从任何Python对象自动生成命令行界面(CLI)的库

Python Fire是一个用于从任何Python对象自动生成命令行界面(CLI)的库

  • Python Fire是在Python中创建CLI的简单方法[1]
  • Python Fire是开发和调试Python代码的有用工具[2]
  • Python Fire有助于探索现有代码或将其他人的代码转换为CLI。[3]
  • Python Fire使Bash和Python之间的转换变得更容易[4]
  • Python Fire使用已导入和创建的模块和变量设置REPL,从而简化了Python REPL的使用[5]

安装

要使用pip安装Python Fire,请运行:pip install fire

要使用Conda安装Python Fire,请运行:conda install fire -c conda-forge

要从源安装Python Fire,请首先克隆存储库,然后运行:python setup.py install

基本用法

你可以打电话给Fire在任何Python对象上:
函数、类、模块、对象、字典、列表、元组等,它们都可以工作!

以下是在函数上调用Fire的示例

import fire

def hello(name="World"):
  return "Hello %s!" % name

if __name__ == '__main__':
  fire.Fire(hello)

然后,您可以从命令行运行:

python hello.py  # Hello World!
python hello.py --name=David  # Hello David!
python hello.py --help  # Shows usage information.

以下是在类上调用Fire的示例

import fire

class Calculator(object):
  """A simple calculator class."""

  def double(self, number):
    return 2 * number

if __name__ == '__main__':
  fire.Fire(Calculator)

然后,您可以从命令行运行:

python calculator.py double 10  # 20
python calculator.py double --number=15  # 30

要了解Fire在函数、对象、字典、列表等上的行为,并了解Fire的其他功能,请参阅Using a Fire CLI page

有关其他示例,请参见The Python Fire Guide

为什么叫“火”呢?

当你打电话给Fire,它会触发(执行)您的命令

我在哪里可以了解更多?

请看The Python Fire Guide

参考文献

设置 命令 注意事项
安装 pip install fire
创建CLI 命令 注意事项
导入 import fire
打电话 fire.Fire() 将当前模块转换为Fire CLI
打电话 fire.Fire(component) 转弯component变成Fire CLI
使用CLI 命令 注意事项
Help command --helpcommand -- --help
REPL command -- --interactive 进入交互模式
Separator command -- --separator=X 将分隔符设置为X默认分隔符是-
Completion command -- --completion [shell] 为CLI生成完成脚本
Trace command -- --trace 获取该命令的火灾跟踪
Verbose command -- --verbose

请注意,这些标志与消防命令之间由独立的--

许可证

根据Apache 2.0许可证

免责声明

这不是谷歌的官方产品